
Follow this guide to get a working multi currency store in about 10 minutes. Each step links to a detailed document if you want to learn more.
Step 1: Check your store currency
Go to WooCommerce → Settings → General and check the Currency field. This is your store currency. Prices you enter in WooCommerce are in this currency.
All exchange rates are based on your store currency. Choose it before you add other currencies. If you change it later, check your rates again.
Step 2: Add currencies
Go to PSM Plugins → Multi Currency → Currencies, click Add new currency and choose a currency. Repeat for each currency you want. See Manage Currencies.
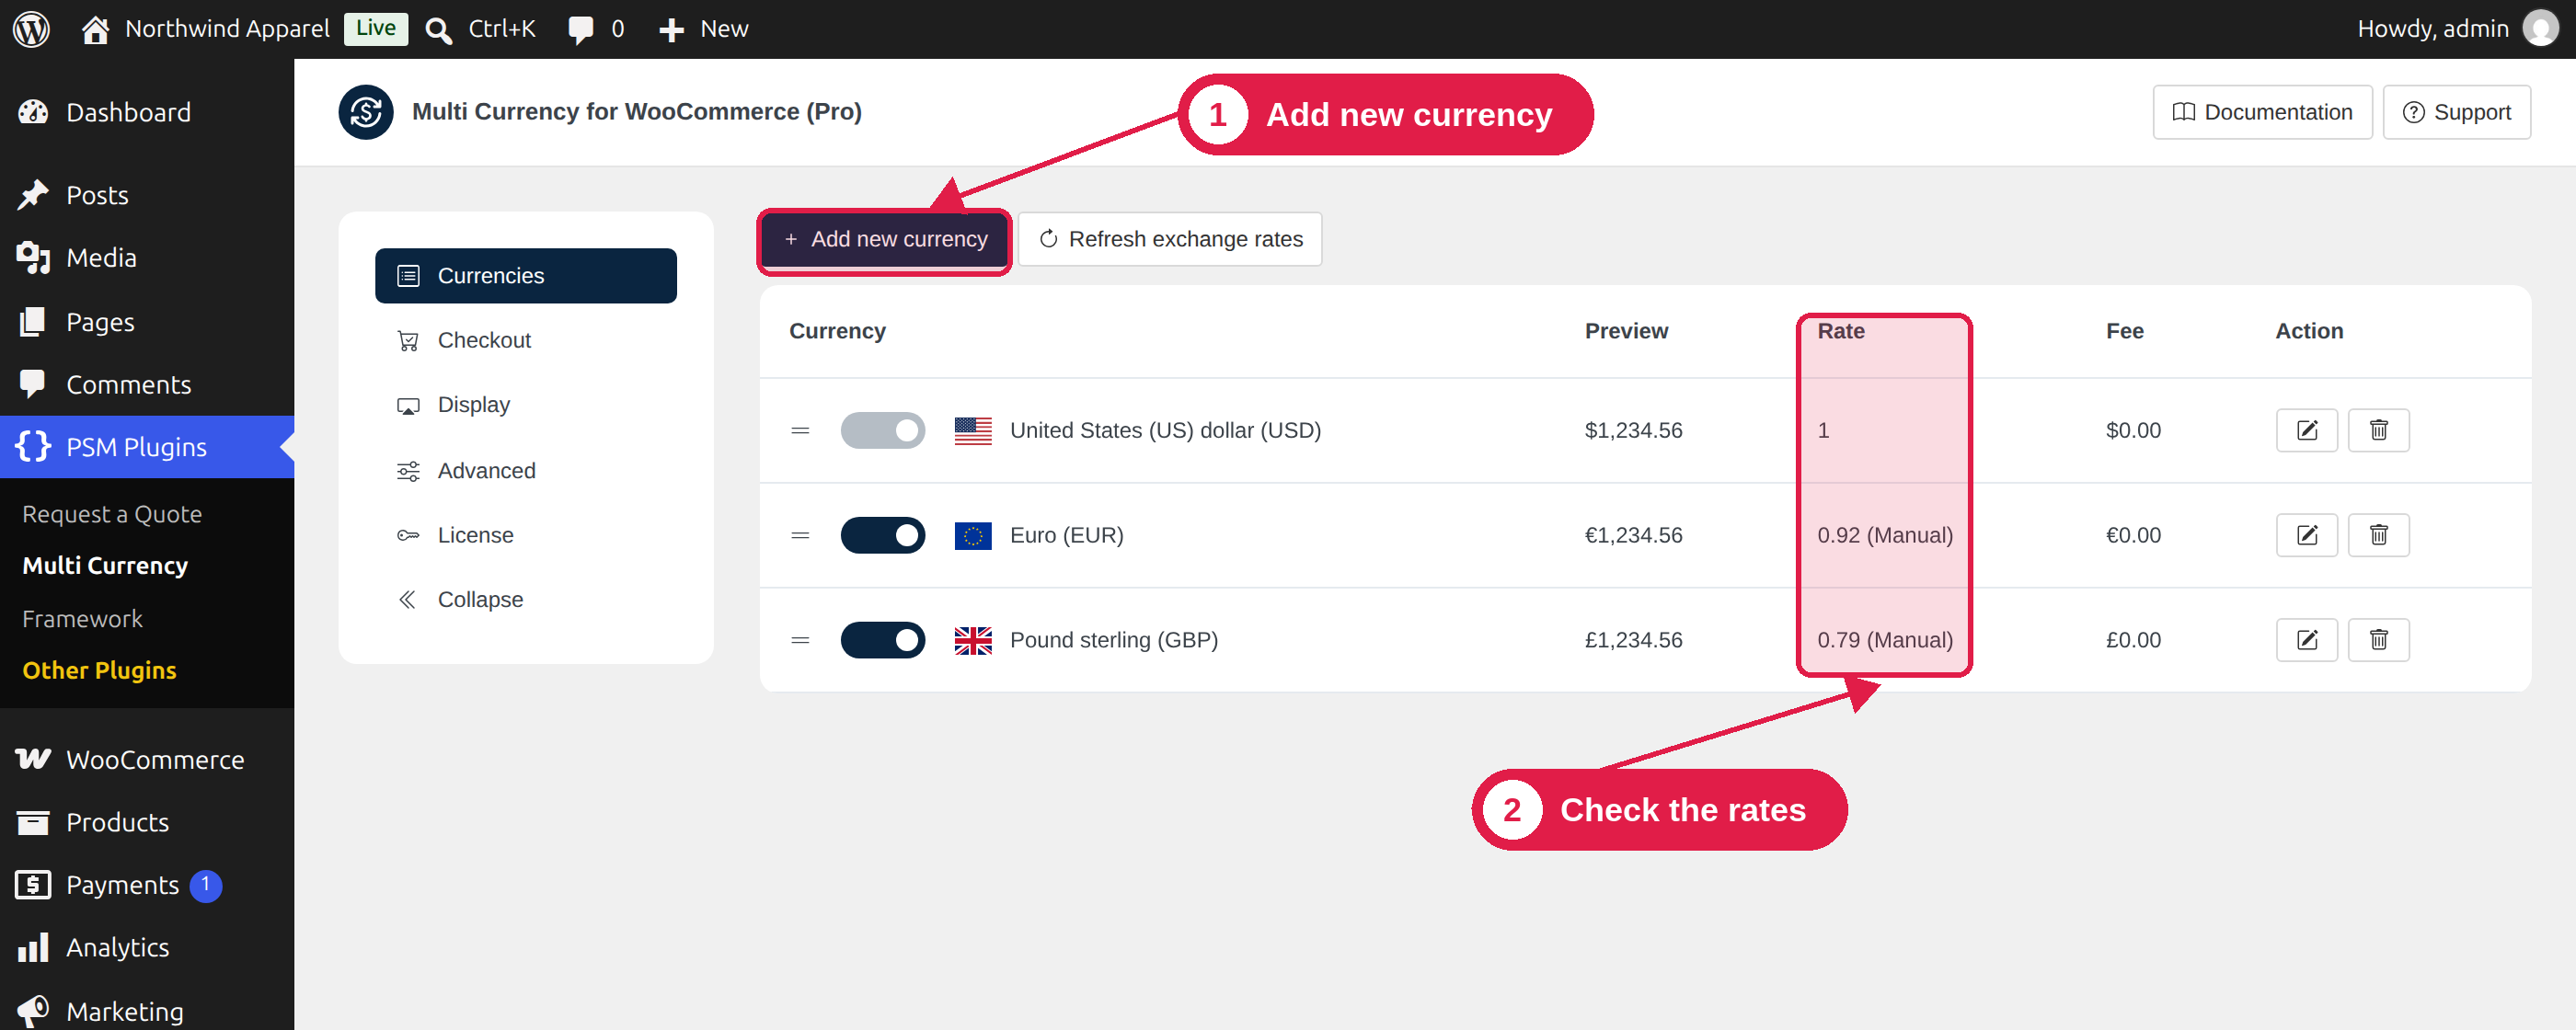
Step 3: Check the rates
Look at the Rate column. Make sure each rate makes sense. A rate of 1 for a currency that is not your store currency usually means the rate could not be loaded. Click Refresh exchange rates, or edit the currency and use a Manual rate. See Exchange rates.
Step 4: Show the currency switcher
By default, the switcher is already shown on the single product page. To show it somewhere else, for example in your header, use the block, the Elementor widget or the shortcode. See Display Settings and Currency switcher shortcode.
Step 5: Set up checkout
Open the Checkout tab. Decide which currencies customers can pay in, and which payment methods each currency can use. See Checkout Settings.
Step 6: Test your store
- Open your shop in a private (incognito) browser window.
- Use the switcher to change the currency. Prices should change.
- Add a product to the cart and go to checkout. Check the prices, shipping and the payment methods.
- Try each currency you added, at least once.
If something does not look right, see FAQ and troubleshooting.