This page shows how to install the free plugin, how to install the Pro plugin, and where to find the settings after installation.
Install the free plugin
From your WordPress dashboard (recommended)
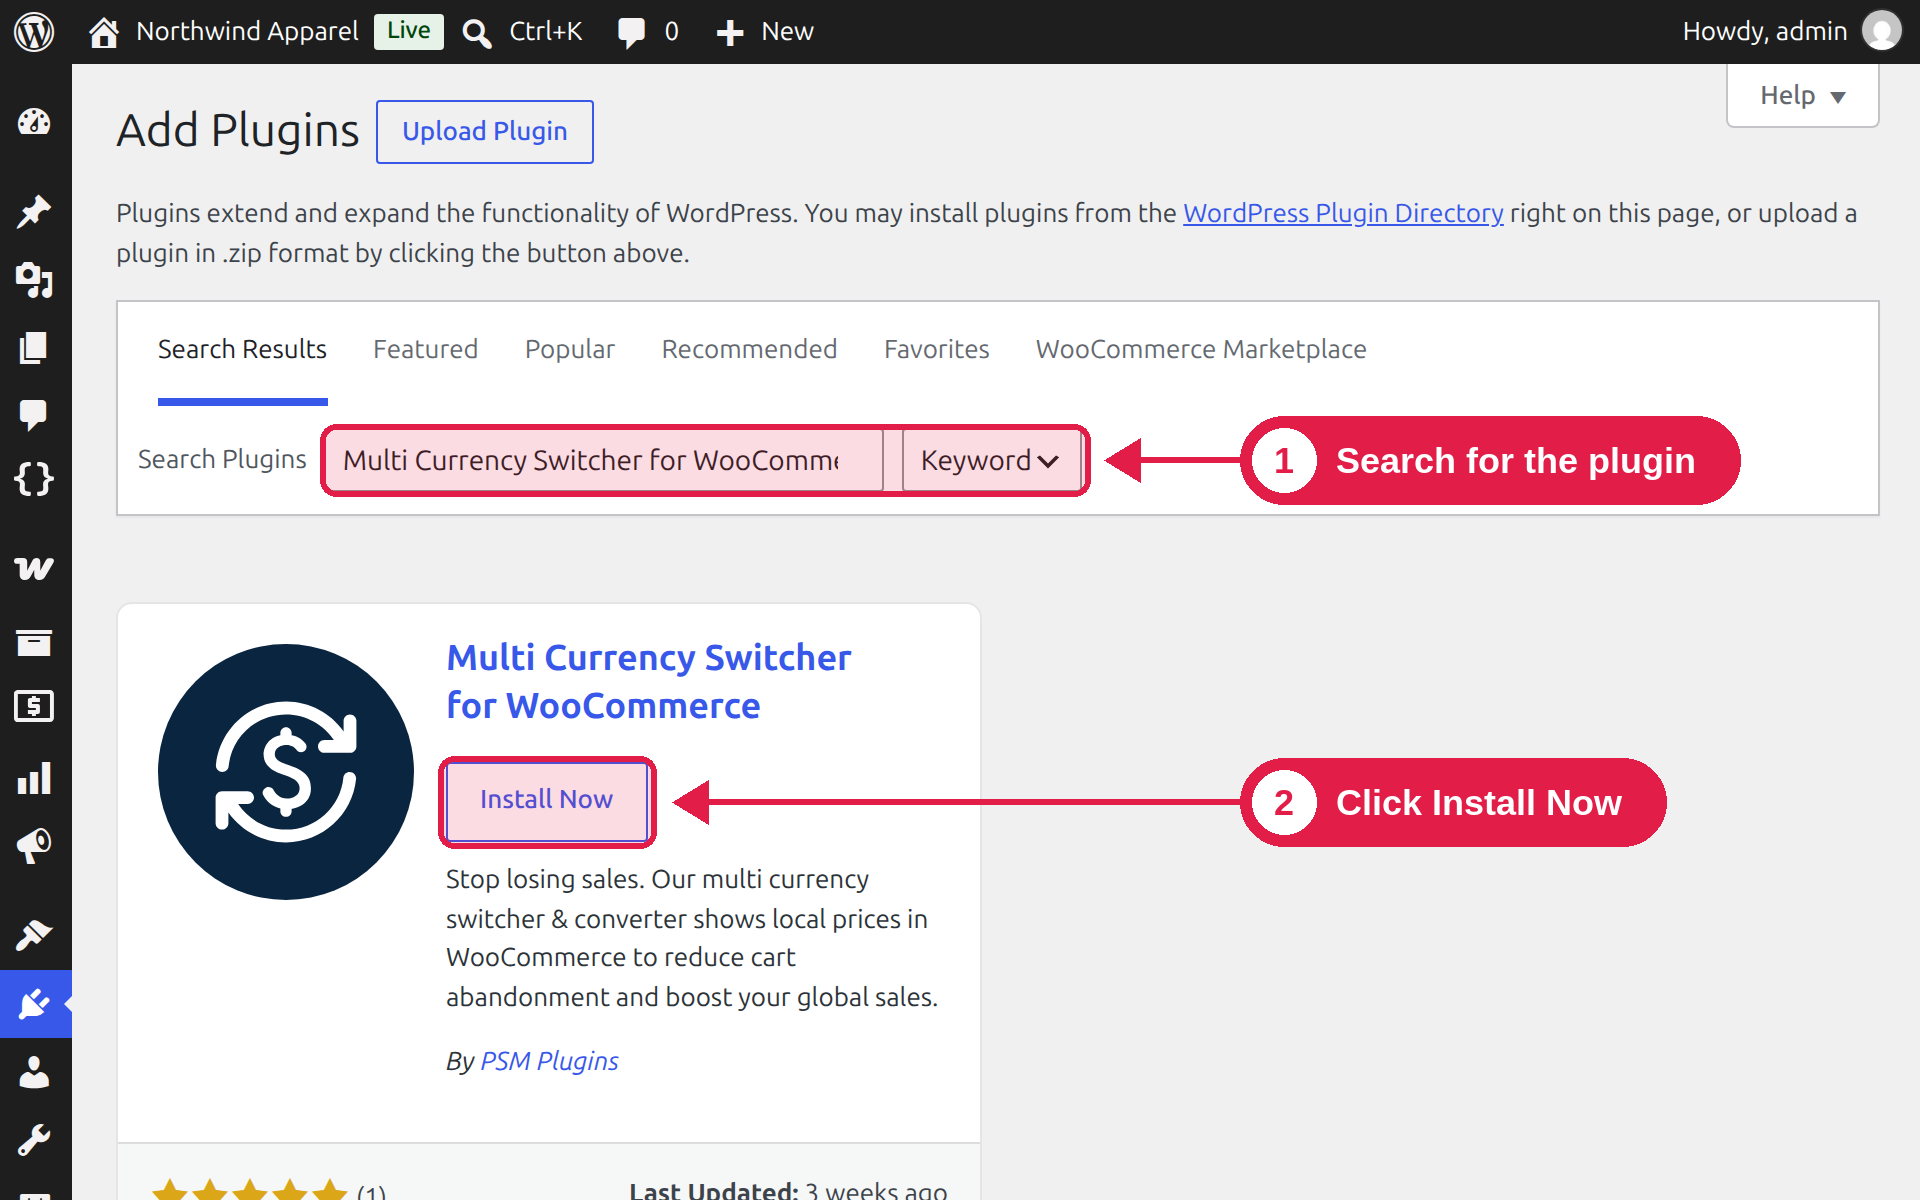
- Go to Plugins → Add New.
- In the search box, type Multi Currency Switcher for WooCommerce – PSM Plugins.
- Find the plugin and click Install Now.
- Click Activate.
By uploading the zip file
- Download the plugin’s .zip file.
- Go to Plugins → Add New and click Upload Plugin.
- Choose the zip file and click Install Now.
- Click Activate Plugin.
Install the Pro plugin
The Pro plugin is a separate plugin. It already includes everything from the free plugin, so you do not need both.
- Download the Pro .zip file from your PSM Plugins purchase.
- Go to Plugins → Add New → Upload Plugin, choose the zip file and click Install Now.
- Click Activate Plugin.
- Activate your license key. See Activate your license key.
Pro uses the same settings as the free plugin. Your currencies and other settings are kept. When the Pro plugin is active, the free plugin stops loading, so we suggest you deactivate and delete the free plugin after Pro is working.
Find the settings
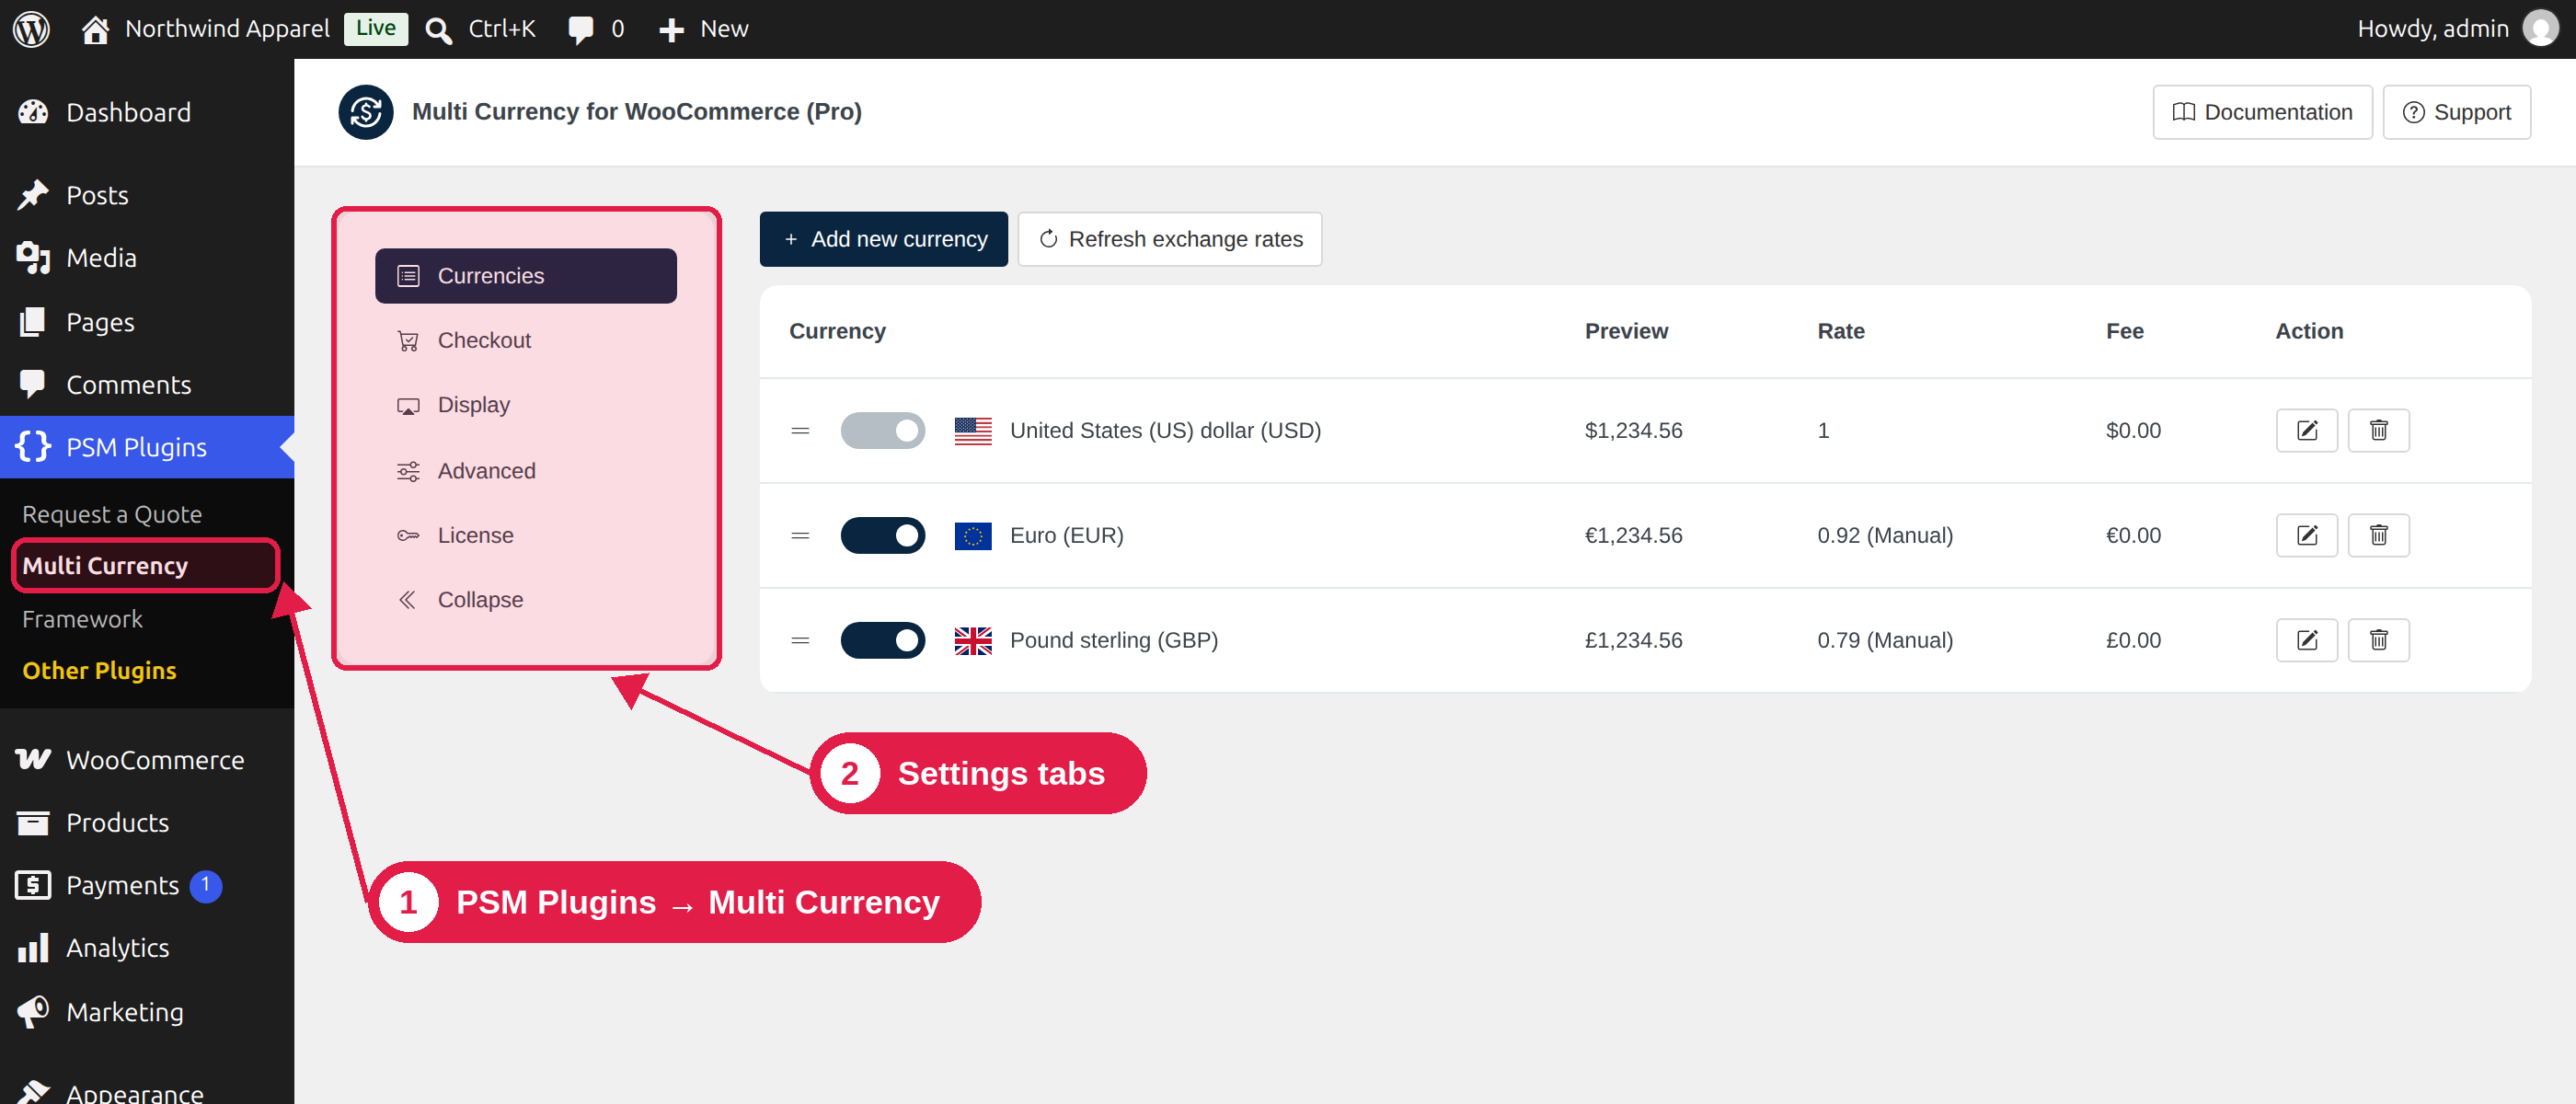
After you activate the plugin, go to PSM Plugins → Multi Currency in your WordPress dashboard. The settings page has these tabs:
What happens on first activation
On first activation the plugin adds your WooCommerce currency as the first currency, with a rate of 1. Your store keeps working as before until you add more currencies.