This page shows how to answer a quote request: check the request, set your prices, and send the quote to the customer.
Step 1: Open the quote
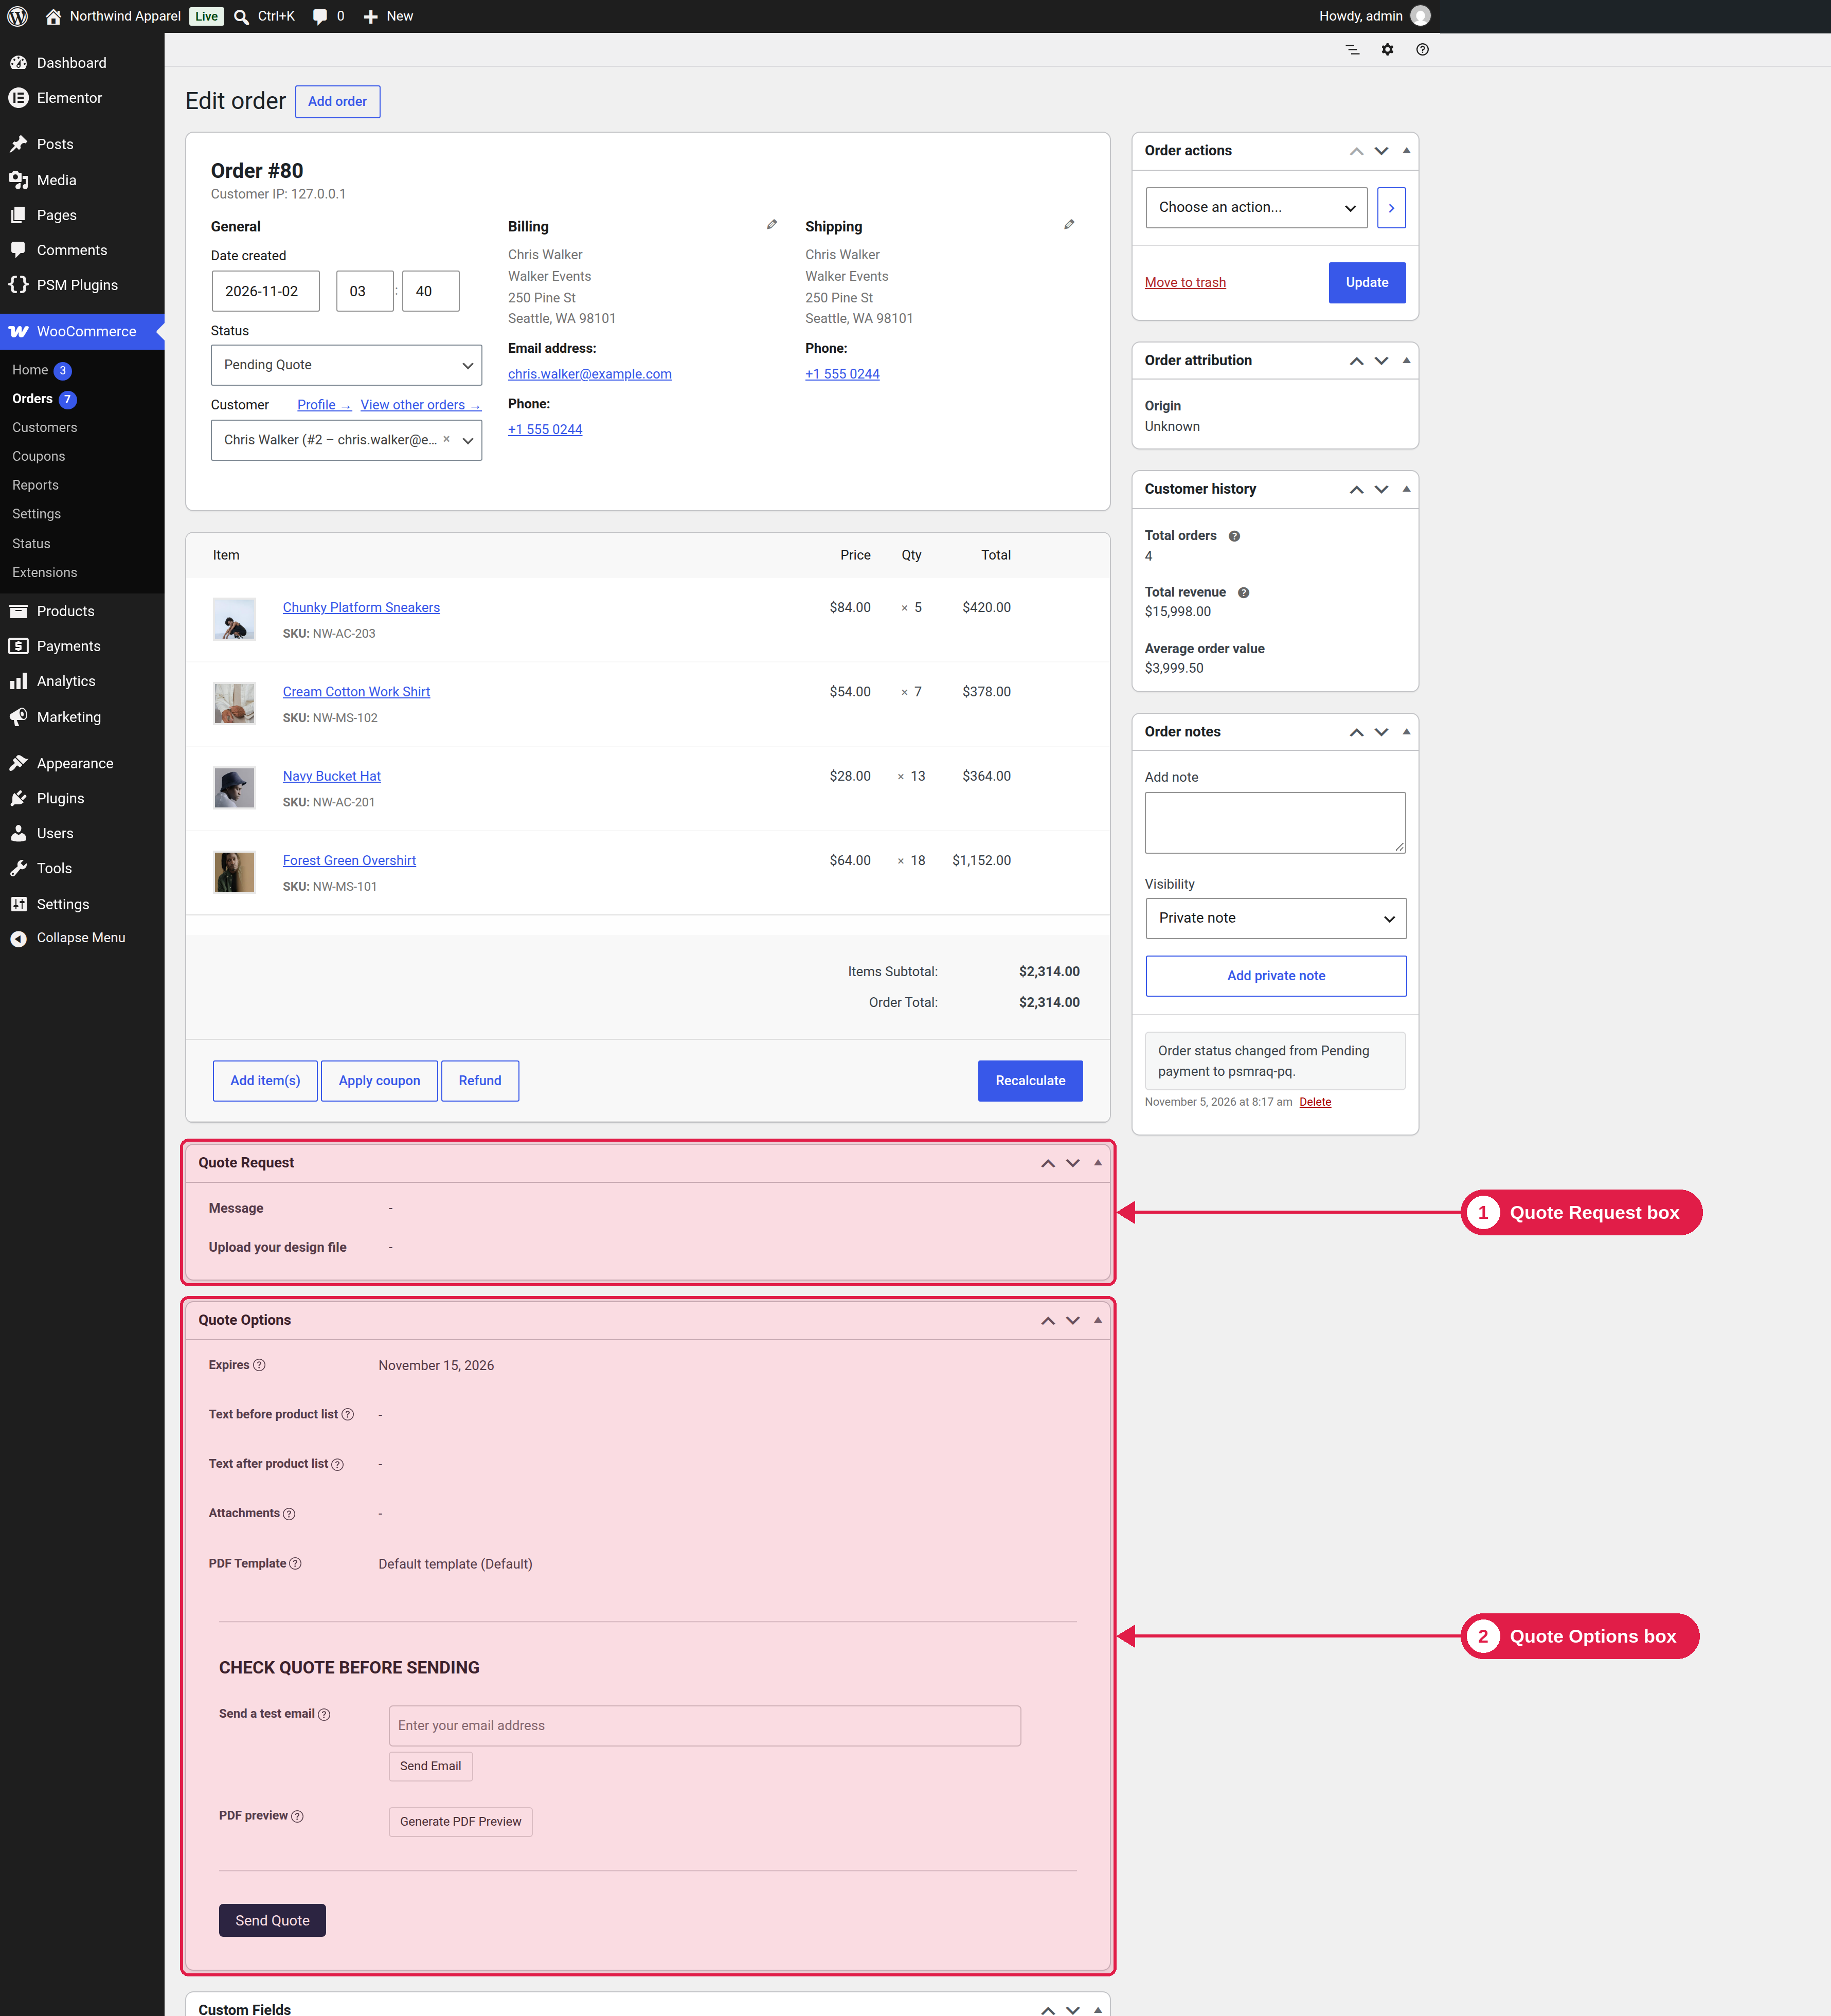
Open WooCommerce → Orders (or the Quote Requests tab) and click a quote with the status New Quote Request. On the order page, you see two extra boxes:
- Quote Request: the answers the customer gave in the form.
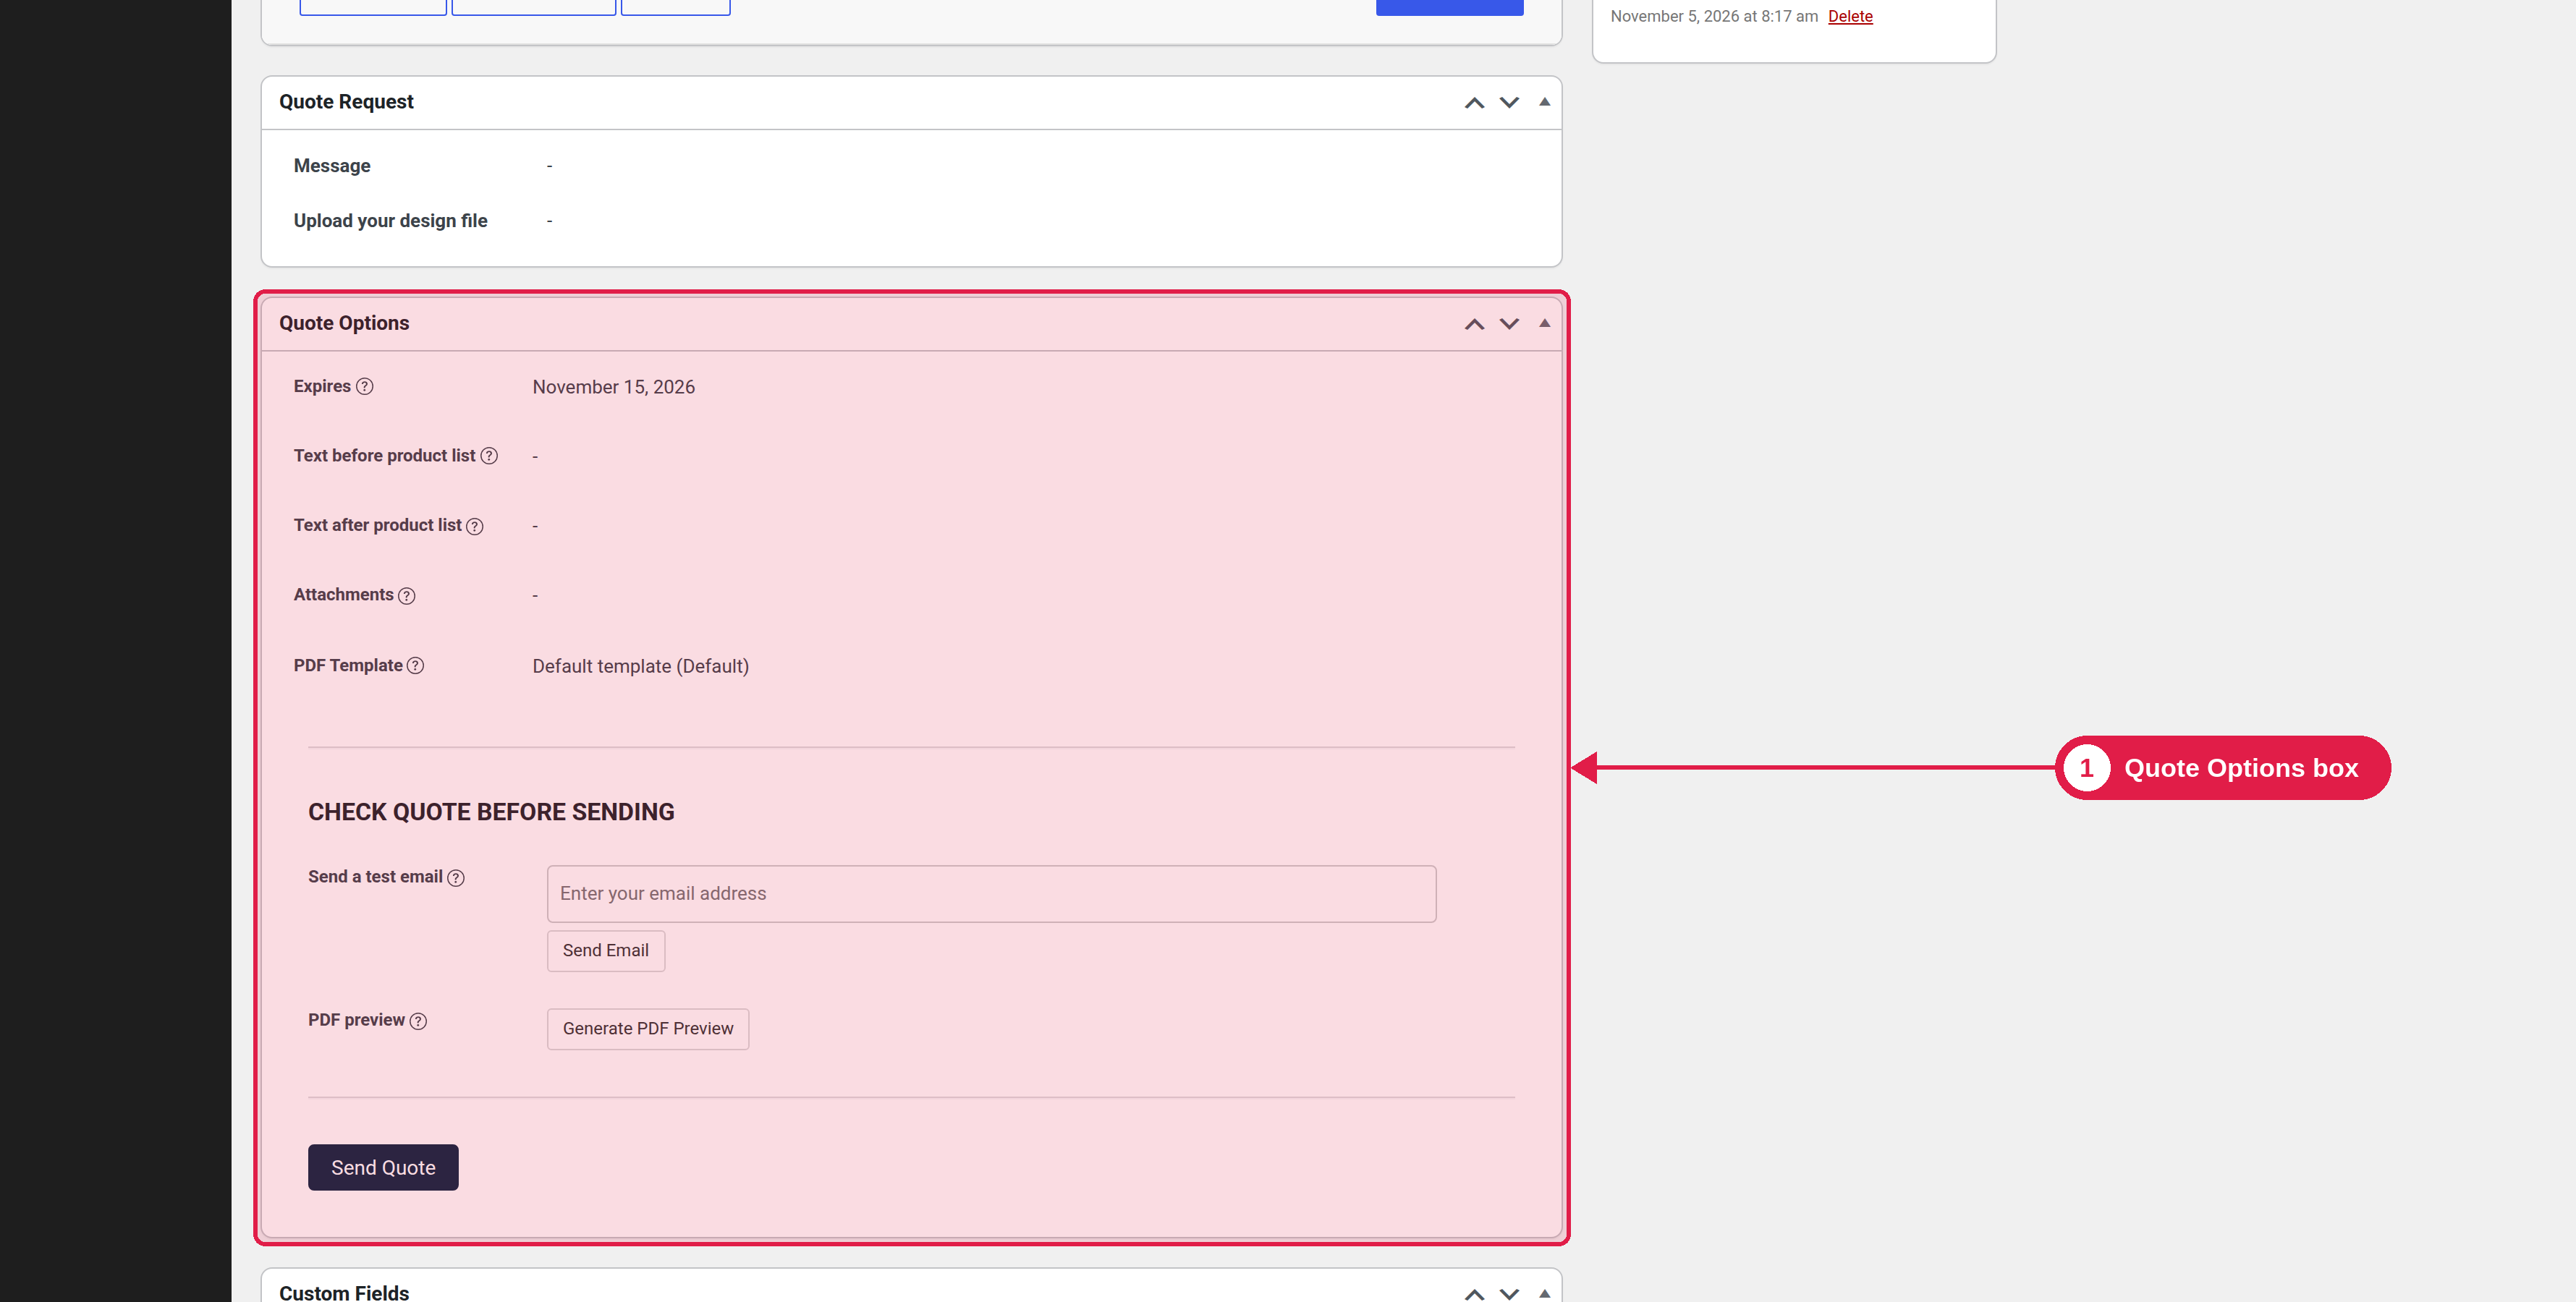
- Quote Options: the settings of the quote and the Send Quote button.
Step 2: Set the prices
Use the normal WooCommerce order tools. Quotes in a quote status can be edited:
- Change the price and quantity of each item.
- Add or remove items, shipping, fees, discounts and taxes.
- Click Recalculate when you finish, so the totals are updated, and click Update to save.
If the customer gave a shipping address, the plugin may already have added a shipping rate. Check that it is right for this quote.
Step 3: Set the quote options
You cannot send a quote without an expiry date, and you cannot send a quote after its expiry date has passed. If you turned on Auto expiry in the Pro Quote Settings, you can leave the field empty, and the date is set when you send. See Quote expiry.
Step 4: Test it (recommended)
Under CHECK QUOTE BEFORE SENDING, use Send a test email. Enter your own email address and click Send Email. You get the quote email, so you can check it before the customer sees it.
Step 5: Send the quote
Click Send Quote. Then:
- The status changes to Pending Quote.
- The Send Quote email goes to the customer’s billing email address.
- The issue date and your name are saved on the quote.
- A note is added to the order: “PSMRAQ: Quote sent to the customer.”
You can see what happens next in View, accept and reject a quote.
Good to know
- When a quote is sent, a new secret link is made for it. Older links of the same quote stop working.
- You can change a Pending Quote and send it again. Make sure the expiry date has not passed.
- Changing the status of an order by hand (for example to Processing) is allowed. Quote reminders and the expiry timer are then cancelled.